

Broken
Aesthetic Smile Restoration Before Her Wedding with a Minimally Invasive Approach
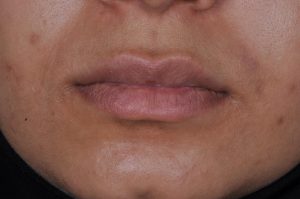
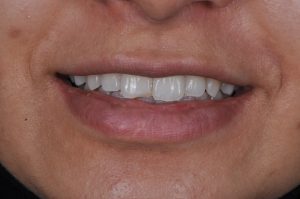
A 24-year-old female patient, Mariam, visited Santosh Dental Care with a broken upper front tooth. With her wedding only a week away, her primary concern was restoring the appearance of her smile so she could feel confident on her special day.
She wanted the tooth repaired in the least invasive way possible while maintaining a natural-looking aesthetic result.
After clinical assessment and evaluation of the tooth’s vitality, a direct composite build-up was planned using Easymatch composite by 3M.
The treatment focused on careful shade selection, conservative preparation, precise composite layering, and detailed finishing and polishing to create a restoration that blended naturally with the surrounding tooth structure.
Case Snapshot
| Case Detail | Information |
| Patient | 24-year-old female |
| Main concern | Broken upper front tooth |
| Immediate concern | Wedding in one week |
| Treatment preference | Least invasive approach with good aesthetics |
| Initial assessment | Periapical radiographs and pulp sensibility testing |
| Pulp status | Vital |
| Treatment performed | Direct composite build-up |
| Composite used | Easymatch composite by 3M |
| Shade selection | Natural shade |
| Isolation | Rubber dam |
| Finishing | Sof-Lex discs |
| Outcome | Patient was thrilled with the result |
What Was the Patient’s Concern?
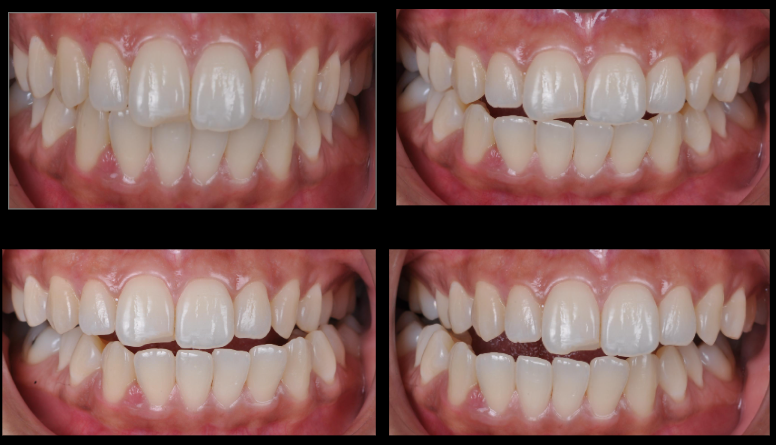
Mariam presented with a fractured upper front tooth, which affected the appearance of her smile.
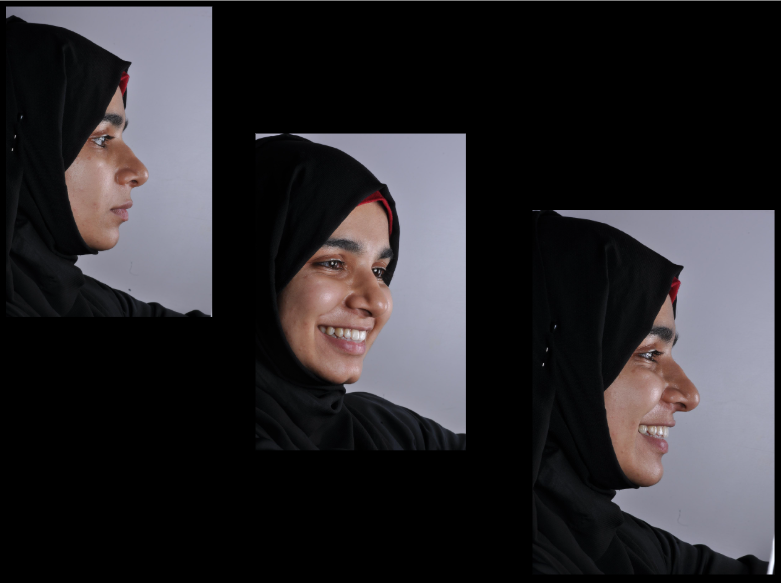
Because her wedding was just one week away, restoring the appearance of the tooth was particularly important to her. She wanted to be able to smile confidently during this important occasion.
At the same time, she preferred a treatment approach that was as minimally invasive as possible without compromising the aesthetic appearance of the restored tooth.
The treatment therefore needed to address two important priorities:
- Restore the fractured portion of the tooth.
- Achieve a natural-looking aesthetic result.
How Was the Tooth Evaluated?
Before deciding on the treatment, the tooth was carefully assessed.
Periapical radiographs were evaluated, followed by pulp sensibility testing using both:
- Electric pulp testing
- Cold pulp testing
The tooth was determined to be vital.
This assessment helped establish the condition of the tooth before proceeding with the restorative treatment.
Based on the assessment and the patient’s aesthetic requirements, a direct composite build-up was suggested.
Why Was Direct Composite Build-Up Chosen?
The treatment plan was based on the patient’s desire to restore the broken front tooth while keeping the approach minimally invasive and aesthetically focused.
A direct composite build-up using Easymatch composite by 3M was selected.
For an anterior tooth restoration, the appearance of the final restoration depends not only on rebuilding the missing portion but also on achieving an appropriate shade and blending the restoration carefully with the natural tooth.
This made shade selection and restoration finishing particularly important in Mariam’s case.
How Was the Composite Shade Selected?
Before beginning the restoration, the appropriate composite shade was carefully evaluated.
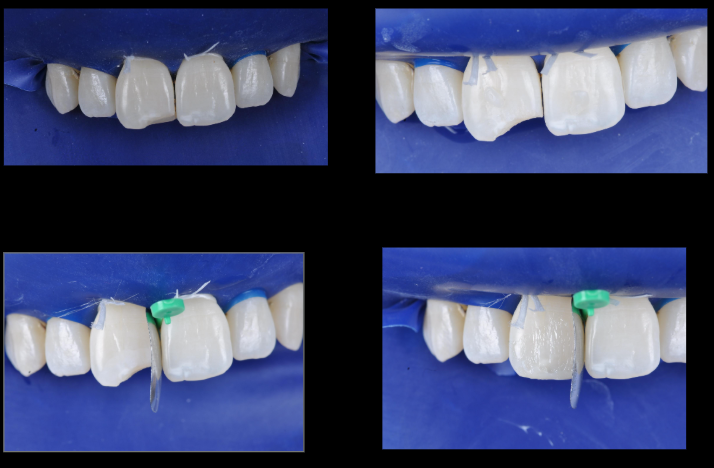
Small composite pellets in three shades were placed over the central incisors:
- Warm
- Natural
- Bright
The shades were assessed in natural light to determine which one blended most naturally with the surrounding tooth structure.
The Natural shade demonstrated the best blending and was selected for the restoration.
This shade-selection process helped guide the aesthetic outcome of the restoration rather than relying only on an assumed shade.
How Was the Tooth Prepared?
Isolation was achieved using a rubber dam.
A 45-degree, 1.5 mm wide bevel was created along the fractured edge of the tooth using a fine-grit tapered bur.
The bevel was incorporated to create a gradual transition between the natural tooth and the composite restoration.
This was particularly important for the anterior tooth because a visible demarcation between the restoration and natural tooth could affect the final aesthetic appearance.
How Was the Composite Restoration Built?
After preparation and isolation, the tooth was etched using 37% orthophosphoric acid.
The tooth was then washed and dried.
A Universal Adhesive by 3M was applied and cured for 20 seconds.
A modified Palodent matrix was then used to build the mesial margin.
Adaptation of the matrix to the tooth was achieved with a wedge positioned between the two central incisors.
A palatal shelf was subsequently built, after which the tooth was progressively layered using the selected composite.
The composite was carefully adapted and shaped to recreate the required form of the fractured portion.
A composite brush was used to blend the restoration margins.
Finishing and Polishing
Once the restoration was completed and post-cured, finishing and polishing were performed using Sof-Lex discs.
The finishing process involved:
- Using coarse discs to create the line angles of the restoration.
- Progressing to fine discs for polishing.
- Refining the restoration to achieve the desired final appearance.
The finishing and polishing stage was an important part of the restoration because the final appearance depends not only on rebuilding the missing tooth structure but also on how the restoration transitions and blends with the natural tooth.
The Final Result
Following completion of the direct composite build-up, the fractured upper front tooth was restored.
The selected Natural shade helped the composite blend with the surrounding tooth, while the bevel, layering technique, margin blending, finishing, and polishing were used to refine the aesthetic appearance of the restoration.
The patient was thrilled with the result and was able to leave with her smile restored ahead of her wedding.
Patient Outcome
Before: Broken upper front tooth
Assessment: Vital tooth confirmed through pulp sensibility testing
Treatment: Direct composite build-up using Easymatch composite by 3M
Shade: Natural
Technique: Layered composite restoration with bevelled fractured edge
Finishing: Sof-Lex finishing and polishing
Outcome: Patient was thrilled with the final result
What This Case Demonstrates
Mariam’s case highlights how the restoration of a fractured front tooth involves more than simply replacing the missing portion of tooth structure.
Several stages contributed to the final result:
- Assessment of the tooth before treatment.
- Pulp sensibility testing to determine vitality.
- Careful shade selection in natural light.
- Appropriate isolation using a rubber dam.
- Bevel preparation to help create a gradual restoration-tooth transition.
- Controlled composite layering to rebuild the tooth.
- Margin blending using a composite brush.
- Detailed finishing and polishing to refine the restoration.
Together, these steps allowed the restoration to address Mariam’s immediate aesthetic concern while following the planned direct composite approach.
Why Shade Selection Matters in an Anterior Tooth Restoration
A front tooth is highly visible when a person smiles, making the shade of a restoration particularly important to its appearance.
In this case, three composite shades—Warm, Natural, and Bright—were compared using small composite pellets placed over the central incisors.
Rather than selecting a shade based solely on assumption, the options were assessed in natural light.
The Natural shade provided the best blending and was therefore selected.
This patient-specific shade assessment formed an important part of the aesthetic treatment process.
Why Was a Bevel Used?
A bevel was placed along the fractured edge at approximately 45 degrees and 1.5 mm wide using a fine-grit tapered bur.
In this case, the purpose was to create a more gradual transition between the composite and the natural tooth.
For an anterior restoration, this transition is particularly relevant to the final appearance because a clearly visible boundary between the restoration and tooth could make the restoration more noticeable.
Why Was Rubber Dam Isolation Used?
Rubber dam isolation was used during the restoration.
It provided the isolation required while the tooth was being prepared, etched, bonded, and restored.
Maintaining appropriate isolation was part of the restorative procedure performed in this case.
Why Was the Restoration Finished and Polished?
After the composite restoration was completed and post-cured, finishing and polishing were carried out using Sof-Lex discs.
Coarse discs were used to establish the line angles, followed by fine discs for polishing.
This final stage helped refine the form and surface appearance of the completed restoration.
Doctor’s Clinical Takeaway
A fractured front tooth can be particularly concerning when it affects a patient’s smile shortly before an important occasion.
Mariam’s case demonstrates the importance of assessing the tooth first, confirming its vitality, carefully selecting the composite shade, and paying close attention to the restoration’s margins, layering, finishing, and polishing.
In an anterior restoration, the final result depends on both the restorative procedure and the attention given to aesthetic details throughout the treatment.
Conclusion
Mariam came to Santosh Dental Care with a broken upper front tooth just one week before her wedding. Her priority was to restore her smile using a minimally invasive approach while maintaining the aesthetics of her natural teeth.
After periapical radiographic assessment and pulp sensibility testing confirmed that the tooth was vital, a direct composite build-up using Easymatch composite by 3M was planned.
The restoration involved careful shade selection, rubber dam isolation, bevel preparation, adhesive application, matrix adaptation, progressive composite layering, margin blending, and detailed finishing and polishing.
The Natural shade provided the best blend in natural light, and after completion of the restoration, the patient was thrilled with the result.
This case demonstrates how careful assessment, material selection, restorative technique, and finishing can work together when restoring a fractured anterior tooth with aesthetic considerations.
Why was pulp testing performed before restoring the broken tooth?
Pulp sensibility testing was performed to assess the condition of the tooth’s pulp before treatment. In Mariam’s case, both electric pulp testing and cold pulp testing indicated that the tooth was vital.
Why were multiple composite shades tested?
Multiple shades were tested to determine which option blended best with the patient’s natural tooth colour. Warm, Natural, and Bright shades were compared in natural light, with Natural providing the best blend.
Why was the Natural composite shade selected?
The Natural shade was selected because it showed the best blending with the patient’s central incisors when assessed in natural light.
What type of restoration was performed?
A direct composite build-up was performed using Easymatch composite by 3M.
Why was a bevel placed on the fractured edge?
A 45-degree, 1.5 mm wide bevel was placed to create a gradual transition between the composite restoration and natural tooth structure and help avoid an obvious demarcation.
What adhesive was used in this case?
Universal Adhesive by 3M was used following etching with 37% orthophosphoric acid. The adhesive was cured for 20 seconds.
How was the mesial margin of the tooth restored?
A modified Palodent matrix was used to build the mesial margin. A wedge placed between the two central incisors helped adapt the matrix to the tooth.
How was the composite restoration built?
A palatal shelf was first built, followed by progressive layering of the selected composite. A composite brush was used to blend the restoration margins.
How was the final restoration polished?
After post-curing, the restoration was finished and polished using Sof-Lex discs. Coarse discs were used for creating the line angles, followed by fine discs for polishing.
How did the patient respond to the final result?
The patient was thrilled with the result after completion of the restoration, particularly as the treatment addressed her concern about her broken front tooth before her wedding.
